
Even though physical implementations of quantum computers make considerable progress, it is not likely that you will have one of them under your desk in the next couple of years. Fortunately, some firms like IBM and Rigetti have decided to make some of their quantum devices available only so that you can play with them. In this post, we will have a first look at IBMs cloud offering – the IBM Q experience.
IBM offers different ways to interact with their quantum computers. The easiest access is provided by the interactive composer which allows you to create a quantum circuit online and to run it on a 5 qubit quantum computer based on superconducting qubits after registering.
The screenshot below shows the editor screen. At the top, you find an overview of the available quantum devices, both realising five (physical) qubits, and some of the main characteristics like error rates and decoherence times.
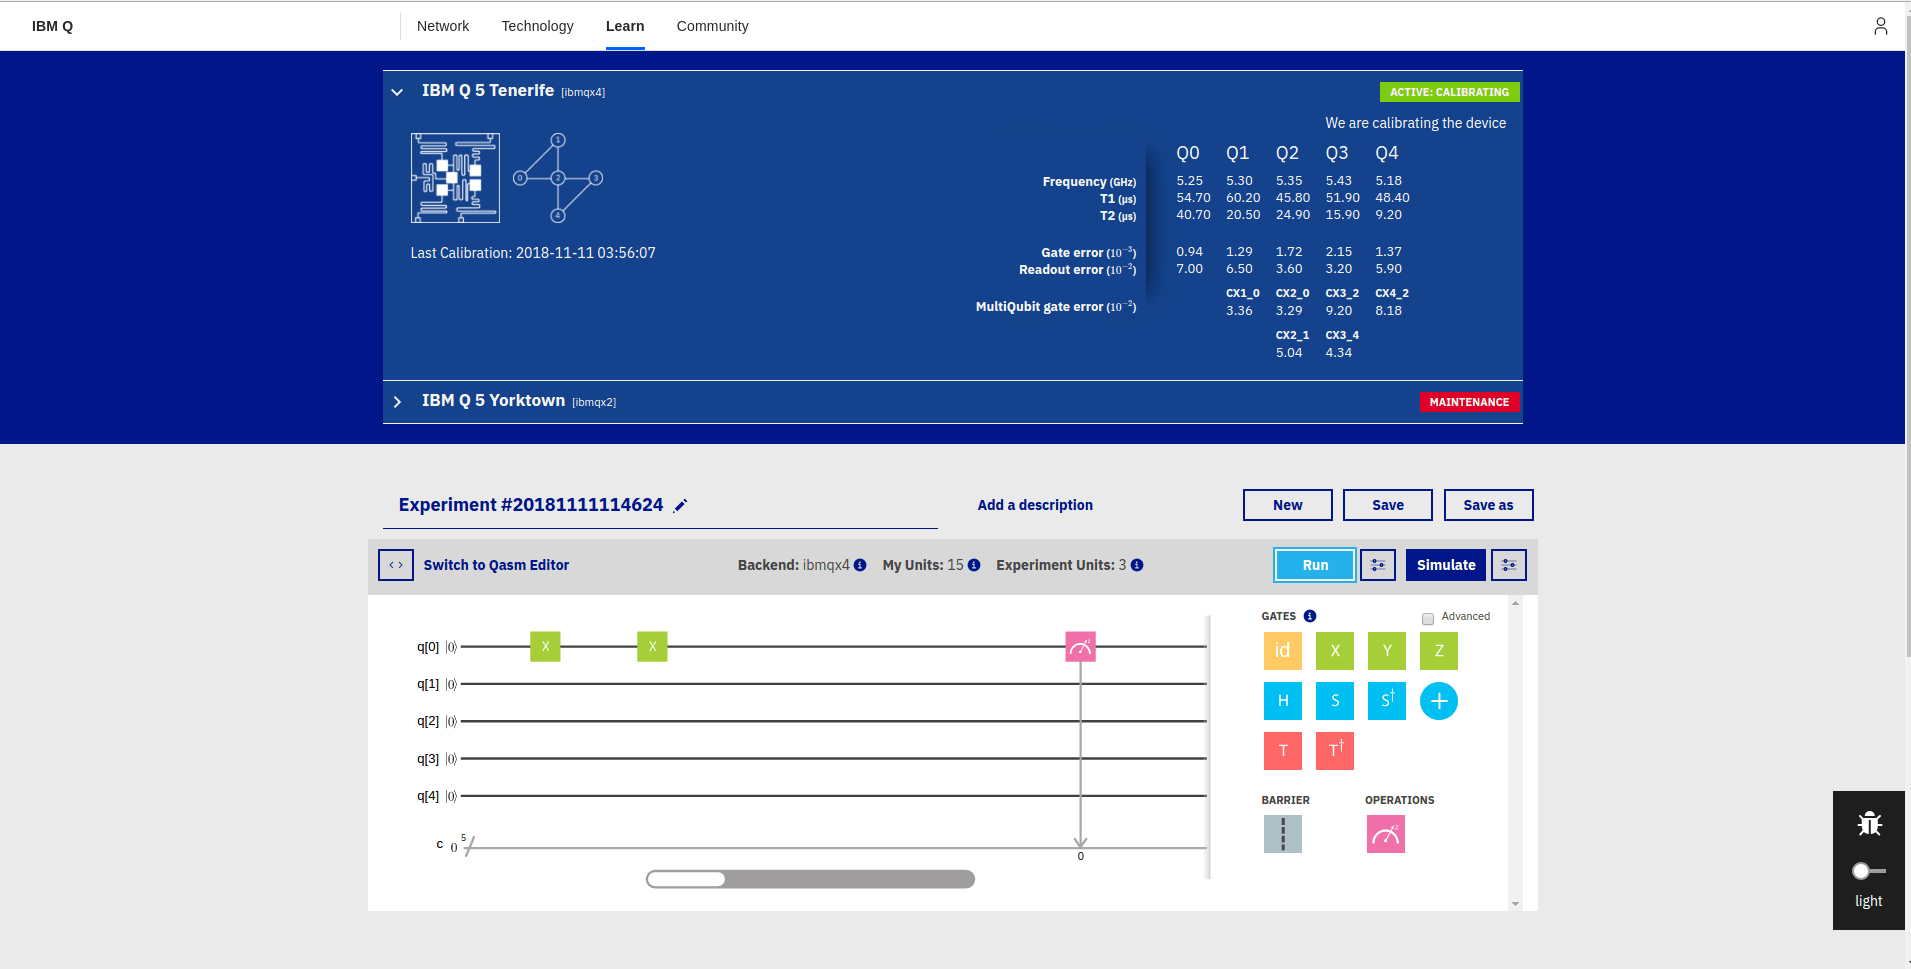
In the lower area of the screen, you can compose quantum circuits graphically. You can add quantum gates that manipulate the five qubits q[0] – q[4] and measurements. After setting up your circuit, you can either simulate the circuit or you can run it on the actual device. It is also possible to export the circuit as a QASM code snippet and to save experiments and results as so-called quantum scores.
Let us now run this circuit on the actual quantum hardware. Doing this consumes units, i.e. credits. A standard run consists of 1024 repetitions and one measurement after each repetition and consumes three units (which are replenished after the execution has completed). The execution is queued and, typically after a few minutes, the results are made available online (and you receive a mail informing you about the execution). When running a circuit, the platform also checks whether that circuit was executed before (by you our someone else) and if yes offers you immediate access to the previous results without consuming any units. The screenshot below shows the result of one of these runs.
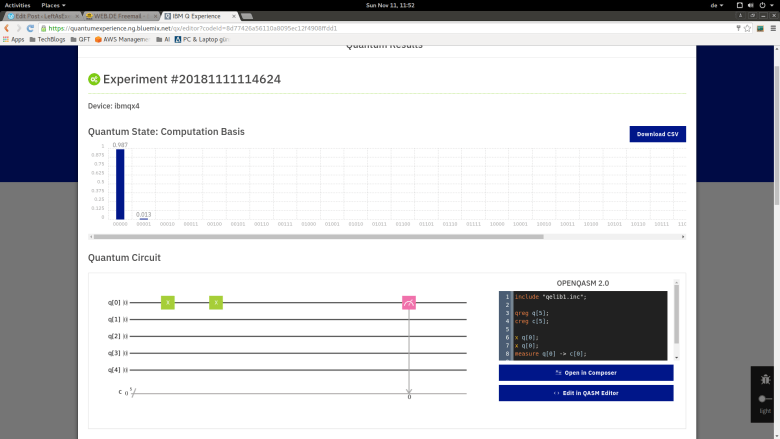
The interesting part is the diagram at the top that shows the measurement outcomes in the computational basis, i.e. for each member of the computational basis on the x-axis, the value shows the percentage of measurements having that basis element as result. In this example, we see that almost always, the result is 00000, as expected from the circuit in which we do a double inversion of the first qubit. However, in some cases – corresponding to 1,3 percent of all runs – the outcome is 00001. This is a nice example for an error that occurs whenever we switch from a simulator to a real physical device. Note that in the IBM Q experience, the qubit q[0] is the least significant qubit and the rightmost qubit in the notation of the computational basis.
Now let us try something else – we want to put our system into an equal superposition

which is the usual starting point for most quantum algorithms. We know that we can achieve this by applying a Hadamard gate on each qubit. The following screenshot shows the resulting circuit for three qubits and the results of a (cached) run.
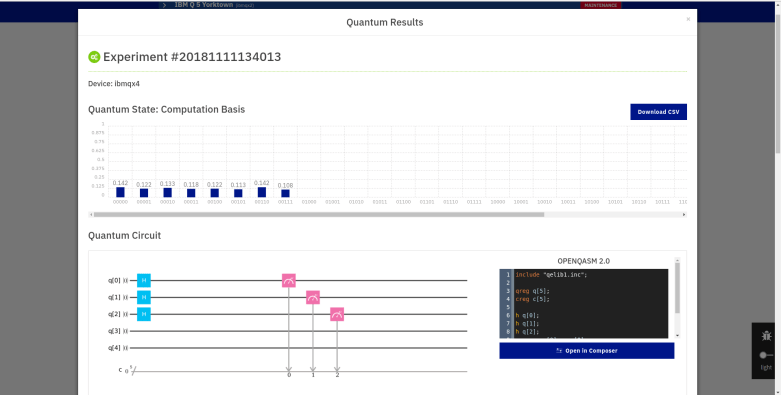
As expected, we see that our measurement results are spread across eight (23) vectors of the computational basis. However, we also see that again, the result does not exactly match the theoretical prediction – the values are not exactly equally distributed but we see slight deviations as before.
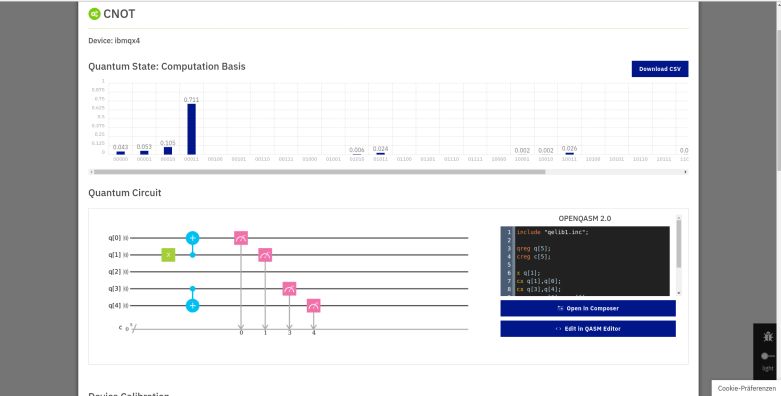
Finally, let us try out a multi-qubit gate. The screenshot below shows the result of a run with two CNOT gates. The first CNOT gate receives a logical one on its control bit, the second CNOT gate a logical zero. Thus, the result should be 00011, i.e. the first (least significant) qubits are inverted. In reality, we again get this result plus some noise, represented by unexpected outcomes in the measurements.
Playing with the composer is fun, and makes it easy to create simple circuits from scratch. However, more complicated circuits soon become difficult to define in this way. For those circuits, the IBM platform offers an API that can be used to run experiments using Python scripts that can much easier be developed and debugged step by step. We will look at this option in a later post. Until then, I recommend you get an account and create some circuits yourself – happy hacking!

2 Comments