
In the previous post in this series, I have presented a simple architecture for an NFT wallet app, written in ReactJS. Today, I will dive a bit deeper into the implementation. The source code for this post can be found here. As most of it is fairly standard ReactJS code, I will not discuss all of it, but only look at a few specific points.
I assume that you are familiar with React. In addition to the React framework, we will also use the web3.js framework to interact with our smart contract. The idea of this post is not to provide a systematic introduction to this framework. In fact, this is not even necessary as the documentation is quite good and – if you have read my previous posts on the corresponding Python framework web3.py – you will soon realize that the structure of the API is quite similar to the Python API that we have used before. There are, however, a few notable differences on which we will focus.
Handling the wallet
One part of web3.js which has no direct counterpart in web3.py is the wallet functionality, available under web3.eth.accounts.wallet. This wallet is essentially an in-memory list of accounts to which you can add accounts and from which you can remove accounts. In addition, the web3 library allows you to store accounts locally, more specifically in browser local storage, encrypted using a password that the caller has to provide.
The wallet component of our sample application loads a wallet from local storage into memory when the page is rendered for the first time (this is realized using a React hook). Once the wallet has been loaded, the list of accounts stored in the wallet is copied to the application state, i.e. the Redux store. When a user adds an account to the wallet or removes an account, the updated wallet is saved again and the wallet is re-synchronized with the list of accounts kept in the state store.
Getting the token image and token data
Another crucial difference between the Python and the JavaScript web3 API becomes apparent if we look at the code that the token details component uses to retrieve the token URI from the smart contract and load the token image. Here is (a simplified version) of the code.
nft.methods.tokenURI(tokenID).call().then((uri) => {
                axios.get(uri).then((response) => {
                    setDescription(response.data.description);
                    setImage(response.data.image);
                    setName(response.data.name);
                }).catch((err) => {
                    console.log(err);
                });
            }).catch((err) =>  {
                console.log(err);
            });
Let us try to understand this code. At the point in time when it executes, the variable nft holds a web3.eth.Contract object that we can use to interact with the smart contract. We then call the method tokenURI of the smart contract, passing, as an argument, the ID of the token. We know that this returns the URI of the token metadata. In the JavaScript code, however, the object that we get back is not yet the URI, but a promise. So internally, web3.js submits the request asynchronously, and the promise resolves when the reply is received.
Once this happens, we use Axios to submit a HTTP GET request for this URI. This again returns a promise, and once this promise resolves, we can extract the token description and the URL of the token image from the metadata returned as a response. When assembling our page, we can then embed the image itself using the image URL, so that the image is only loaded once the page is rendered.
Of course, both promises can raise an error, so we need two catch blocks where we log the respective error. Also note that this code is placed in a hook, and therefore the data is not yet available upon first rendering. We thus need to make sure that we update the state with the received data to trigger a re-rendering, and that the JSX code we use to build the page is prepared to also work if the data we need, like the image URL, is not yet present.
Submitting and tracking transactions
The code that we use to actually submit a transaction, i.e. sell a token, has a very similar structure. Again, let us look at a simplified version of it.
nft.methods.safeTransferFrom(...).estimateGas(..).then((gas) => {
  nft.methods.safeTransferFrom(...).send(...)
    .on("transactionHash", (hash) => {
       // add transaction to transaction list
    })
    .on("receipt", (receipt) => {
       // update transaction status
    })
    .then(() => {
       // success, clear errors
    })
    .catch((err) => {
       // handle error during transaction
    });
  }).catch((err) => {
     // handle error during gas estimation
})
Let us again go through this line by line to see how it works. First, we access the method safeTransferFrom which, as we know, is the recommended way to trigger a transfer. We could now immediately call the send method of the resulting method object, in order to send a transaction to the Ethereum node (by the way: we do not have to sign this transaction manually, as the account that we use is part of the wallet managed by web3.js). The problem with this approach, however, is that we need to provide a gas limit. Of course we could guess, but this would not be very efficient. Instead, we first run a gas estimate, which will result in a first call to the server.
In JavaScript, this call is handled via a corresponding promise. Once this promise resolves, we know that the gas estimation was successful and also know the gast limit – time to call the send method to trigger the actual transaction. What this returns is what the web3.js documentation calls a PromiEvent. This is a promise which has some mixed-in methods of an event emitter, and allows our code to react on events like the availability of a transaction hash or a transaction receipt in a promise-like notation. When we first receive the transaction hash, we add the transaction to the transaction list and force a re-rendering of the list. Similarly, when we receive the receipt, we update the status of the transaction to “mined”. At this point, the promise will resolve and the transaction is complete. Note that we do not wait for a confirmation in the sense that our transaction is not only included in a block (i.e. we have a receipt), but a few additional blocks have been mined so that we can be confident that the transaction is also part of the canonical chain.
Running the sample app
To try out the sample app, clone my repository, then switch to the frontend directory and use npm to install all required packages.
git clone https://github.com/christianb93/nft-bootcamp.git
cd nft-bootcamp/frontend
npm install
This might of course take a while, depending on the speed of your network connection, as it will download and installed all required JavaScript packages and their dependencies. Once the last command completes, you can start the frontend by running
npm start
To use the frontend, you will of course need a running Ethereum node and a copy of the smart contract deployed. To this end, start a copy of geth by executing ./tools/run_geth from a second terminal (assuming that you have installed geth as described in one of my previous posts), open a third terminal, navigate to the root directory of the repository and run
python3 tools/GethSetup.py
python3 install/deployAndMintNFT.py
This should set up a few test accounts with sufficient balance, deploy a copy of the smart contract, print out the contract address and mint five token. Having this in place, go back to the welcome page of the wallet app which should look as follows.
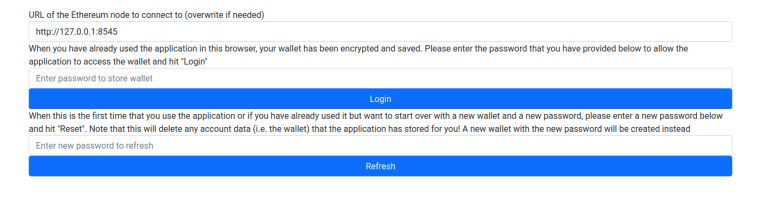
Pick a password, enter it in the input field right above the “Refresh” button and hit that button. Next you will have to set up a few test accounts. For starters, enter the private key 0xc65f2e9b1c360d44070ede41d5e999d30c23657e2c5889d3d03cef39289cea7c in the input field next to the button “Add account” and press that button. This should result in the account 0xFC2a2b9A68514E3315f0Bd2a29e900DC1a815a1D being added to the wallet. Mark this account as primary account by activating the radio button next to it. Then, enter the private key 0x2d7bdb58c65480ac5aee00b20d3558fb18a916810d298ed97174cc01bb809cdd to create a second account.
Next, we will add a token to the watch list. Click on “Token Watchlist”, enter the contract address which was spit out by the deployment script and token ID 1 and click on “Add Token”. Repeat this process for the remaining token IDs 2 to 5.
The setup is now complete, and you can start playing with the app. You can, for instance, hit any of the “Details” buttons to display an individual token or to sell a token (make sure to have selected the correct primary account in the wallet first, which needs to match the current owner to be able to sell). This should also populate the list of transactions, with the transactions showing up as mined immediately.
Have fun! There are probably still tons of bugs in the code, after all this is only a bit more than a quick hack to demonstrate how to use the involved libraries – still, if you find one and wish to contribute, I am happy to accept pull requests.
